Build an application with Webpack (Part 1)

Today, I will introduce you to a very popular technique now in applications. This is considered a necessary skill to become a good frontend developer. Ok, Let’s start.
What is webpack?
Today, the logical processing is concentrated in the frontend of the application making the size and ability to load pages become extremely slow. Therefore, webpack was born and is considered a savior for the front-end dev. Webpack is currently the most widely used module bundled with a huge support community and extremely powerful functionality. In short, Webpack is a tool that helps encapsulate the entire program source code as well as images, fonts, and CSS (all of these things called assets) into one file (or several files).
How to install webpack?
Firstly, you have to create a directory and install a framework to build SPA. I choose react because it is relatively easy to implement.
After that, I installed a few packages related to webpack:
- Webpack imports source files into a single bundle file, and it uses loaders to compile different file types.
- Webpack-dev-server is suitable for development environment. Webpack-dev-server runs on the platform of Express node.js server and runs port 8080.
- Webpack-cli is suitable for production environment. It is like command line.

Here, I will create a folder to config webpack files. Here, I divided them into 3 files for different purposes:

- webpack.config.js: It is considered a general config of development and production environments. They can inherit properties from it.
- webpack.dev.js: This is the file to configure webpack for the development environment.
- webpack.prod.js: This is the file to configure webpack for the production environment.
Then, I will revise scripts in package.json.

What does webpack include?
We need to understand some of the webpack properties like: entry, output, modules, plugins, resolve, optimization.
First, in the webpack.config file, I will export it with the options parameter. For each separate environment, the options value will be different.

1. Entry
Entry point is the start of webpack. It is the place to declare the file paths in the project which want to be converted.

For development environment, I have used the react-dev-utils / webpackHotDevClient library so that I can connect to WebpackDevServer by a socket and get notified about changes. Instead of the default WebpackDevServer client. This is called hot-reloading.

2. Output
The output is also very easy to understand, it will tell the webpack need to save the file after compiling. However, we do not always have only one single entry, if you have many singles and want to build out multiple outputs, you can apply the naming method as placeholder [name].

For development enviroment, I won’t use [hash] for better performance.

For production enviroment, I will use [chunkhash] because there is no css file for every single entry.

You can learn more about: [hash], [chunkhash], [contenthash] through:
https://stackoverflow.com/questions/35176489/what-is-the-purpose-of-webpack-hash-and-chunkhash
The use of [chunkhash] as above is called cache busting. Because the browser will cache the contents of static files like css, js based on the file path. If each build does not change the file name, the example is always style.css. Then the browser will still retrieve the content in the cache based on the old name.
Then, if you try to run webpack, you will get an error. The reason is that it will not understand the ES6 import syntax. Therefore, we use the loader to solve this situation.

3. Loader
Loaders are libraries that will intervene before we import the file, which allows the webpack to expand the ability to not only bundle javascript, but also other static resources, such as css, image, svg, …
a. Js, Jsx, Ts, Tsx
I will convert all of the JS code in the project to ES5 so that it can work on most browsers. However, we need a conversion tool called babel.

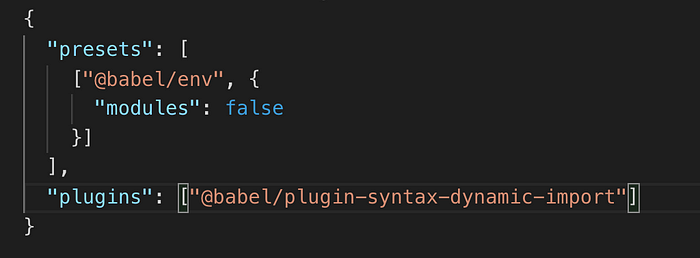
First, I will create a file called .babellrc. You can install many babel plugin types, but in this case, I only installed @babel/plugin-syntax-dynamic-import to assist in the file import.
You can see more at: https://babeljs.io/docs/en/plugins
And this is loader for it. Here, I will compile all js, mjs, jsx, ts, tsx files in the project except the files in node_modules folder.

b.css
You want install style-loader, css-loader.

c. image
- url-loader works like file-loader except that it embeds assets
- smaller than specified limit in bytes as data URLs to avoid requests.

d. scss

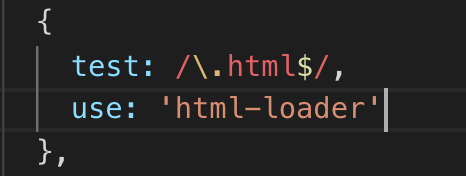
e. Html
You want to install html-loader.
f. Exception files
After compile all the files, the remaining files will become ext files to optimize size of the project.

Also, you can refer to more about less, sass, sassModule, media,…
In conclusion
After that, try running with a terminal: npm run dev. If the result looks like the image below, you have succeeded.

In the next section, I will introduce to you about plugins, optimization, resolve, …
References:
https://medium.com/ag-grid/webpack-tutorial-understanding-how-it-works-f73dfa164f01